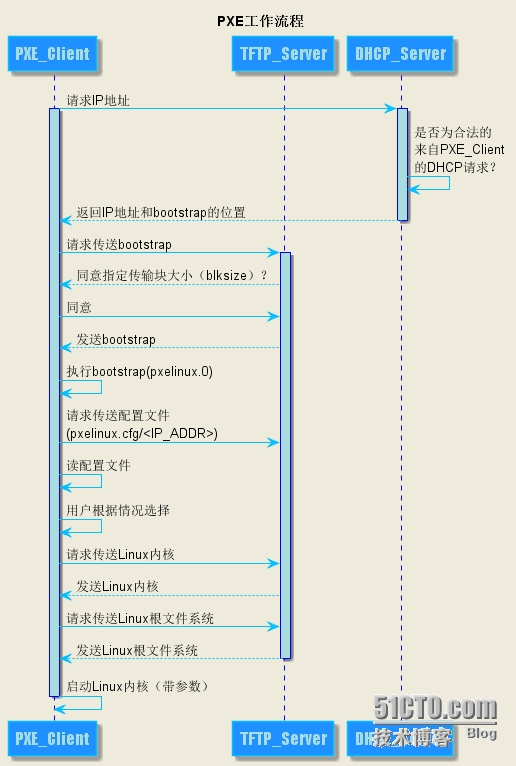
介绍
PXE(Pre-boot Execution Environment,预启动执行环境)是由Intel公司开发的最新技术,工作于Client/Server的网络模式,支持工作站通过网络从远端服务器下载映像,并由此支持通过网络启动操作系统,在启动过程中,终端要求服务器分配IP地址,再用TFTP(trivial file transfer protocol)或MTFTP(multicast trivial file transfer protocol)协议下载一个启动软件包到本机内存中执行,由这个启动软件包完成终端基本软件设置,从而引导预先安装在服务器中的终端操作系统。
安装
server 192.168.1.201 功能:dhcp,tftp,kickstart
主机 dhcp分配
安装上面软件
1
| [root@201 ~]# yum install dhcp httpd tftp-server xinetd syslinux -y
|
配置dhcp
 1
 2
 3
 4
 5
 6
 7
 8
 9
10
11
12
13
14
15
16
17
18
| [root@201 ~]# whereis dhcp
dhcp: /etc/dhcp
[root@201 ~]# vi /etc/dhcp/dhcpd.conf
#
# DHCP Server Configuration file.
# see /usr/share/doc/dhcp*/dhcpd.conf.example
# see dhcpd.conf(5) man page
#
subnet 192.168.1.0 netmask 255.255.255.0{ #网段
range 192.168.1.50 192.168.1.55; #分配IP地址范围
option subnet-mask 255.255.255.0; #子网掩码
default-lease-time 21600; #默认IP地址租用期限
max-lease-time 43200; #指定IP地址最长最用期限
next-server 192.168.1.201; #TFTP服务器地址
filename "/pxelinux.0"; #从TFTP根目录下载pxelinux.0文件
}
[root@201 ~]# systemctl start dhcpd
[root@201 ~]# systemctl enable dhcpd
|
配置apache
 1
 2
 3
 4
 5
 6
 7
 8
 9
10
11
12
13
14
15
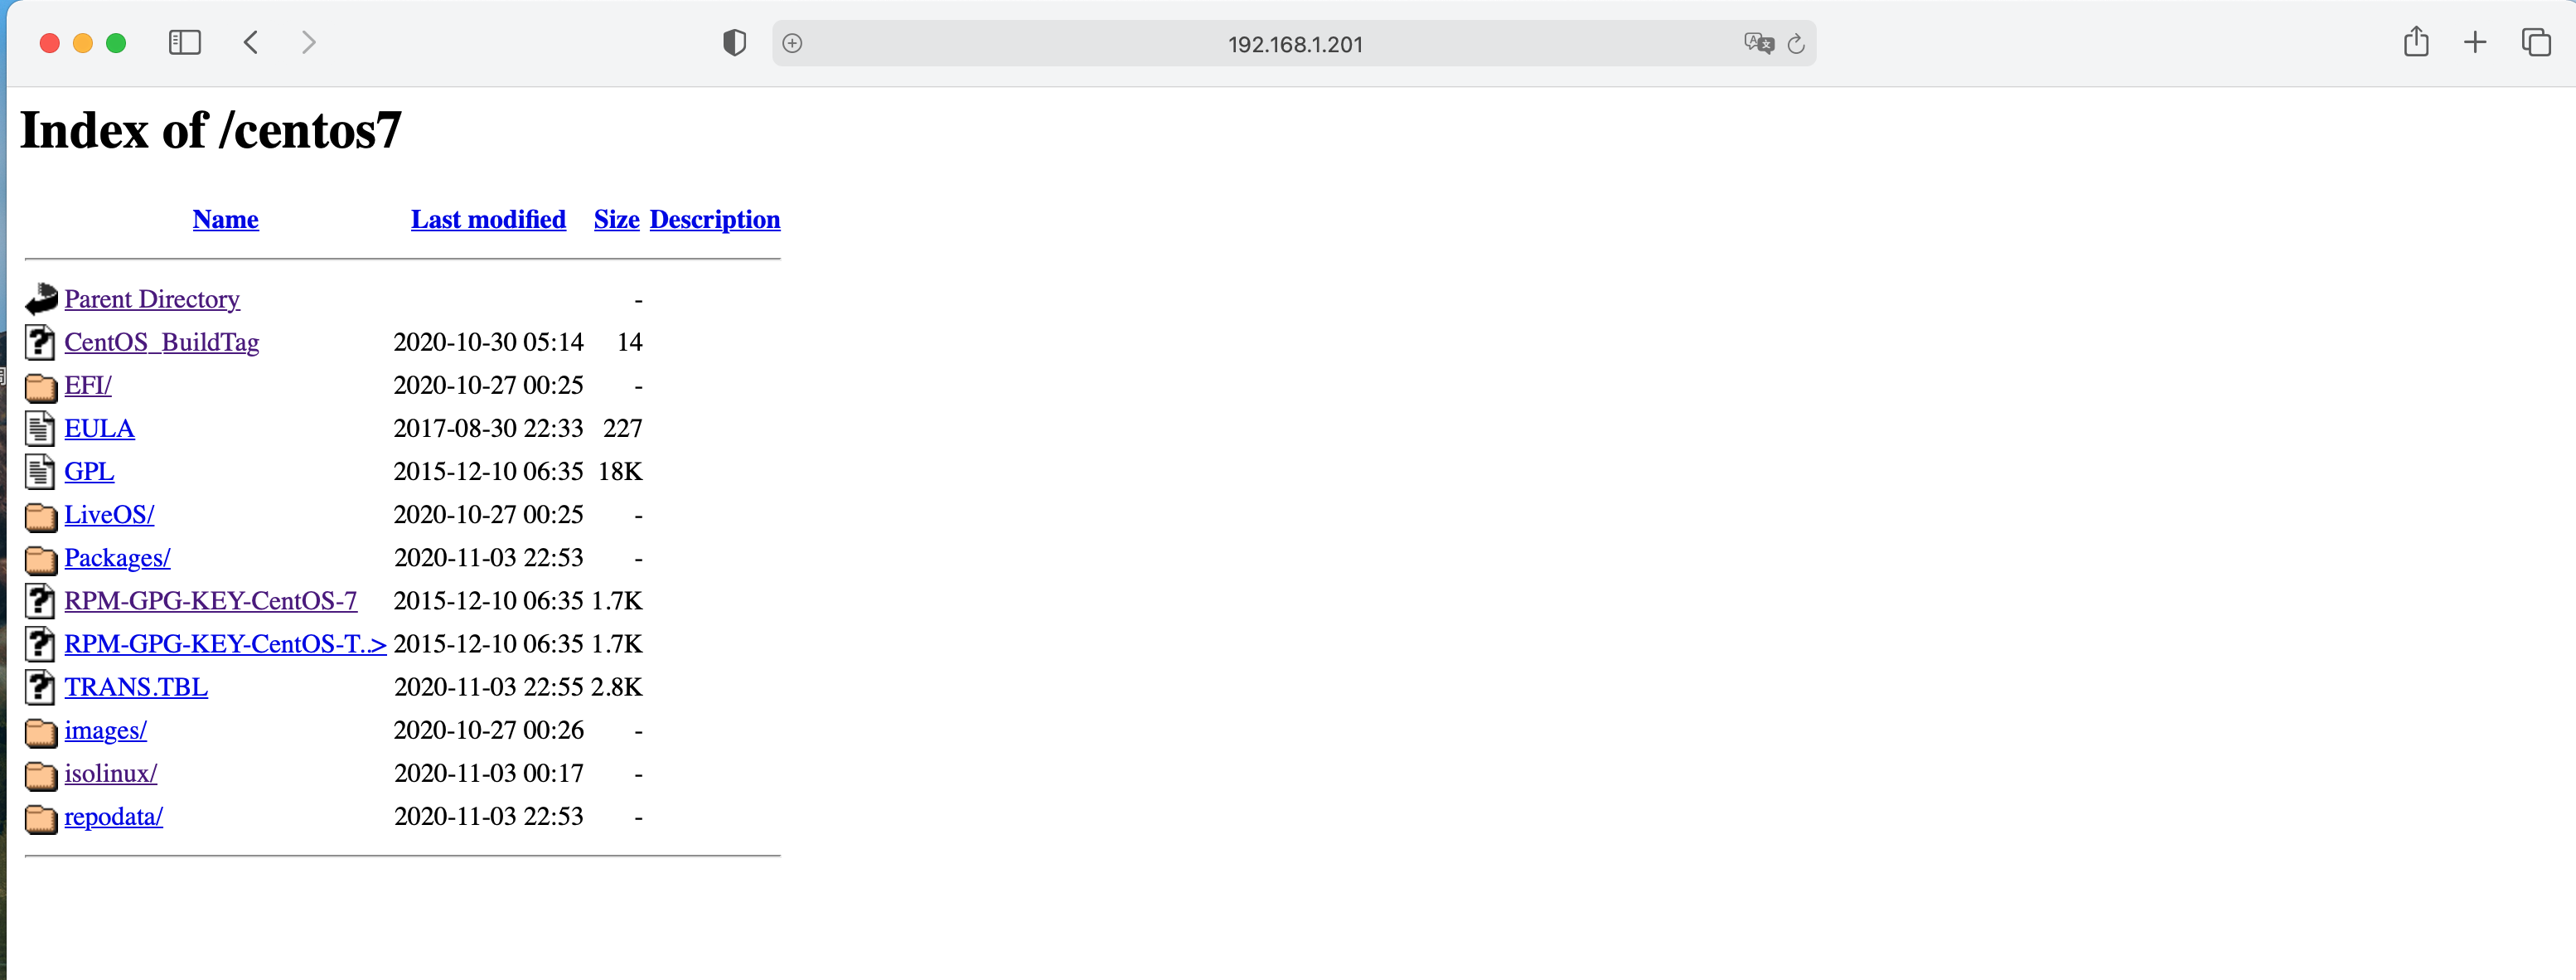
| [root@201 ~]# mkdir /var/www/html/centos7
[root@201 ~]# mount /dev/cdrom /var/www/html/centos7/
mount: /dev/sr0 写保护,将以只读方式挂载
[root@201 ~]# df -h
文件系统 容量 已用 可用 已用% 挂载点
devtmpfs 1.9G 0 1.9G 0% /dev
tmpfs 1.9G 0 1.9G 0% /dev/shm
tmpfs 1.9G 12M 1.9G 1% /run
tmpfs 1.9G 0 1.9G 0% /sys/fs/cgroup
/dev/mapper/centos-root 17G 2.9G 15G 18% /
/dev/sda1 1014M 194M 821M 20% /boot
/dev/sr0 973M 973M 0 100% /var/www/html/centos7
tmpfs 378M 0 378M 0% /run/user/0
[root@201 ~]# systemctl start httpd
[root@201 ~]# systemctl enable httpd
|
配置tftp
 1
 2
 3
 4
 5
 6
 7
 8
 9
10
11
12
13
14
15
16
17
18
19
20
| [root@201 ~]# vi /etc/xinetd.d/tftp
# default: off
# description: The tftp server serves files using the trivial file transfer \
# protocol. The tftp protocol is often used to boot diskless \
# workstations, download configuration files to network-aware printers, \
# and to start the installation process for some operating systems.
service tftp
{
socket_type = dgram
protocol = udp
wait = yes
user = root
server = /usr/sbin/in.tftpd
server_args = -s /var/lib/tftpboot
disable = no #yes改为no
per_source = 11
cps = 100 2
flags = IPv4
}
[root@201 ~]# systemctl start xinetd.service
|
kickstart部署
- 配置pxe引导
1
2
| [root@201 ~]# cp /usr/share/syslinux/pxelinux.0 /var/lib/tftpboot/
[root@201 ~]# cp /var/www/html/centos7/isolinux/* /var/lib/tftpboot/
|
- 修改客户端配置文件
 1
 2
 3
 4
 5
 6
 7
 8
 9
10
| [root@201 tftpboot]# mkdir pxelinux.cfg
[root@201 pxelinux.cfg]# vi default
default menu.c32
prompt 0
timeout 30
menu title centos7 install
label 1
menu label ^1 Install CentOS 7
kernel vmlinuz
append initrd=initrd.img inst.ks=http://192.168.1.201/ksconfig/ks.cfg #ks.cfg路径
|
- 配置ks.cfg文件
 1
 2
 3
 4
 5
 6
 7
 8
 9
10
11
12
13
14
15
16
17
18
19
20
21
22
23
24
25
26
27
28
29
30
31
32
33
34
35
36
37
38
39
40
41
42
43
44
45
46
47
48
| [root@201 ~]# mkdir /var/www/html/ksconfig
[root@201 ksconfig]# cp /root/anaconda-ks.cfg ./ks.cfg #anaconda-ks.cfg为每次系统安装完成后root目录都会生成这个文件 可以修改使用
[root@201 ksconfig]# vi ks.cfg
#version=DEVEL
install #全新的安装
url --url=http://192.168.1.201/centos7/ #远程镜像文件
text #使用文本模式安装
# System authorization information
auth --enableshadow --passalgo=sha512
# Use graphical install
graphical
# Run the Setup Agent on first boot
firstboot --disabled
firewall --disabled
ignoredisk --only-use=sda
# Keyboard layouts
keyboard --vckeymap=cn --xlayouts='cn'
# System language
lang zh_CN.UTF-8
# Network information
network --bootproto=dhcp --device=ens33 --onboot=yes --ipv6=auto --no-activate
network --hostname=test
# Root password
rootpw --iscrypted $6$80N.qztAj82SX8N7$CKxkQzV35wjGXX/TH6YeWm4Sp9FRrnfO3riqtib.vB7syUfjROB4bykisUMbfUsLa/2Ov4B3OaQdiZYYadbKR1
# System services
services --enabled="chronyd"
# System timezone
timezone Asia/Shanghai --isUtc
# System bootloader configuration
bootloader --append=" crashkernel=auto" --location=mbr --boot-drive=sda
autopart --type=lvm
# Partition clearing information
clearpart --none --initlabel
# Reboot after installation
reboot #重启服务器
%packages #安装软件包
@^minimal
@core
chrony
kexec-tools
%end
%addon com_redhat_kdump --enable --reserve-mb='auto'
%end
%anaconda
pwpolicy root --minlen=6 --minquality=1 --notstrict --nochanges --notempty
pwpolicy user --minlen=6 --minquality=1 --notstrict --nochanges --emptyok
pwpolicy luks --minlen=6 --minquality=1 --notstrict --nochanges --notempty
%end
|
安装完成


